Using Book Creator/id
Daftar isi
Menggunakan Pembuatan Buku
Membuat buku memungkinkan Anda untuk memilih beberapa halaman wiki, mengatur ulang urutan buku dan kemudian mengubah mereka menjadi:
- Open Document Format (odt), atau
- Portable Document Format (pdf).
Open Document Format dapat dibuka di LibreOffice atau OpenOffice (dan kemudian disimpan sebagai Microsoft Word jika dibutuhkan). Ini memungkinkan Anda untuk mengedit atau mengatur ulang format dokumen sehingga menjadikannya terlihat benar-benar mengagumkan.
Portable Document Format dapat dibuka dengan free viewer apa pun, seperti Adobe Acrobat Reader dan siap dicetak - format tidak dapat diubah sehingga jika Anda benar-benar ingin produk sesuai yang Anda mau, Anda harus menggunakanpilihan odt.
Memulai Membuat Buku
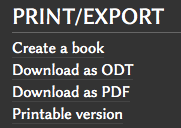
Untuk memulai membuat buku, klik bagian tautan 'Membuat buku' di bagian bawah halaman:
Anda akan melihat pilihan:
(tekan di tombol hijau!)
Panel Membuat Buku
Setelah Anda mulai membuat buku, panel yang tampak di bawah akan muncul di bagian atas setiap halam sampai Anda menghentikan membuat buku.
Menambah halaman
Anda sekarang dapat menavigasi ke halaman apa pun yang Anda mau dan menambahkannya ke buku Anda menggunakan tombol Hijau +. Tidak perlu khawatir dengan urutan halaman pada tahap ini - pastikan bahasa yang digunakan bahasa yang Anda inginkan - bahasa yang Anda dapat lihat adalah bahasa yang akan ditambahkan.
Menambahkan tautan
Anda dapat juga menambahkan halaman dengan menekan di bagian tautan - saat Anda menaruh cursor pada tautan, Anda akan melihat gambar kecil muncul:
![]()
Tekan bagian ini dan tambahkan halaman tautan ke buku Anda.
Menghentikan pembuatan buku
Anda dapat menghentikan pembuatan buku kapan pun dengan menekan 'disable'.
Mengatur buku Anda
Untuk mengatur buku Anda, tekan 'Tampilkan Buku.'
Menyelesaikan isi buku
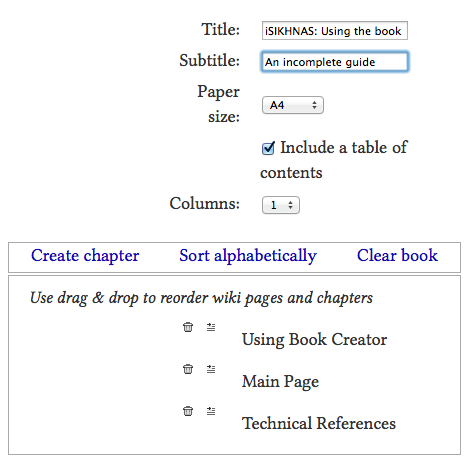
Anda dapat membuang halam dari buku Anda (jangan hapus halaman wiki!!), lihat halaman dan atur kembali halaman dari interface ini.
Anda juga harus menyebutkan judul, dan rincian keluaran lain yang Anda inginkan. Judul harus mulai dengan iSIKHNAS sehingga mudah mencari dokumen.
Downloading the book
When you are ready to download the book, you just need to choose the format you want, and then click on the download link
You will come to a page which tells you that the book is rendering (being put together). When it is done it will present a download link for you to use to download the copy.
Saving the book
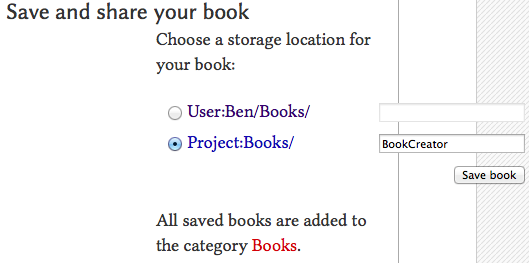
You can also save your book - to save it so that others can see it and use it, save it in the Projects options, not the user option.
You can now come back to your book
Troubleshooting
Q. My book is not being produced?
A. Sometimes the process just borks - this seems to normally be when the process indicator is at 1.06%. If refreshing the page doesn't help, going back and starting it again seems to.
Q. My images are too wide!! Help!
A. If there is not an empty line before and after an image, it seems to spread out the text or the image to fit the full width of the page. You can help this by setting the image width in the [File:image.png|529px] tag, but the extra space is the most helpful.
Q. The pdf output is not very nicely laid out?
A. The wiki is designed for very consistent web based layout. The pdf rendering process has to add details which the wiki does not store. For this reason we have enabled the word processor output format (odt).
Q. Hang on! Where is the content I just added?
A. At this point, it seems as though the page you added to you book is the page that is printed - if the page has been changed since you added it, you need to delete the page from your book and add it again. Click on the view page link - when you get to the page, click the red - sign to remove the page, then the green + to add it again.


