Manage : Manage Users
Daftar isi
- 1 Manage Users
- 1.1 Update Data User
- 1.2 Delete Data User
- 1.3 Change user password
- 1.4 Create Data User : Registering new users and updating current users
- 1.5 First name
- 1.6 Surname
- 1.7 Phone
- 1.8 Email
- 1.9 Password
- 1.10 Location
- 1.11 Infrastructure
- 1.12 Area responsibility
- 1.13 Group
- 1.14 Manage : Manage Users : User Settings
Manage Users
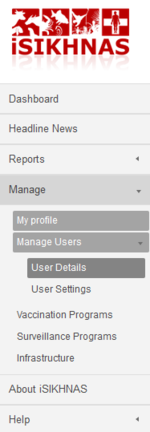
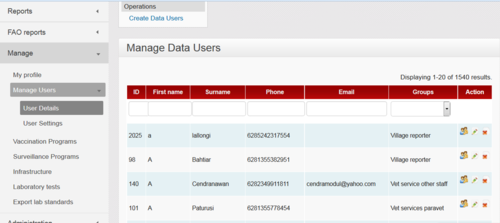
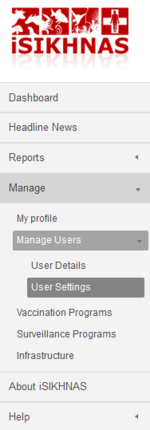
Coordinators are primarily responsibile for managing users. District coordinators are responsible for managing most data reporters - vets, para-vets and other people involved in sending reports. One important role of coordinators is to keep user records up to date and managing the permissions set for each individual. They do this through the Manage : Manage Users : User Details menu on the iSIKHNAS website.
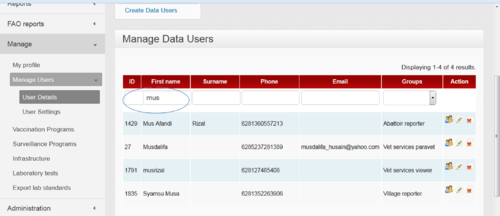
Remember, there are many thousands of iSIKHNAS users and the most efficient way to search for a particular person is to start to type the person's name or other details in the empty fields at the top of the page. This will help the system to sort through all the records and find the individual.
This will give you a short list of users to choose from.
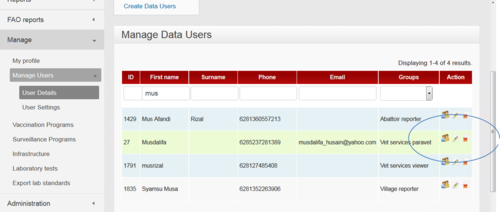
Then you choose the middle icon - the pencil - to edit the user's details. To edit the user's password, click on the left icon - figure with a key. The right hand icon - the red cross - deletes (or hides) the user from the list.
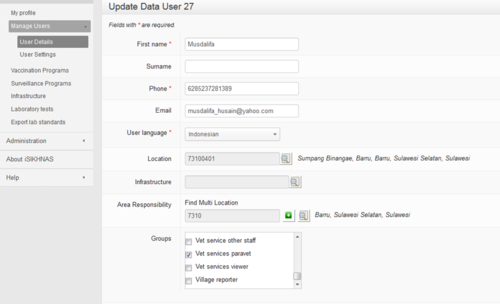
Update Data User
Once you have chosen a particular user and clicked on the edit icon you will be taken to the user's details for updating. This is what you would do for example if someone changes their mobile phone number, moves jobs, changes their area of responsibility, starts work at an identified infrastructure.
Don't forget to press the Save button on the bottom of the form when you have finished editing.
Delete Data User
It is actually not possible to completely delete data from the database. Data is actually hidden from view when you "delete" it, so it can be retrieved in the future should it ever be necessary. If you need to "delete" a user you can do so by clicking on the cross icon next to the user's name.
Change user password
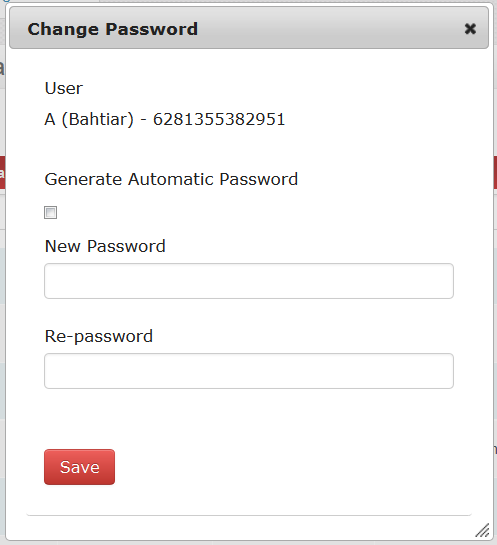
If a user forgets their webaccess password the local iSIKHNAS coordinator should be contacted. The coordinator will have to access the user's details through the Manage : Manage Users : User details : Manage Data Users menu. Choose the correct user through the search headings at the top of the page and click on the Change password icon. You will have to give the user a new password. This can be done by generating one automatically or by giving the user the one of his or her choice. You do this in the same way as you would during user registration.
Make sure you save and tell the user their new password.
Create Data User : Registering new users and updating current users
All users of iSIKHNAS must be registered before they are able to use the system. This is the case for both data reporters and data viewers.
New users can be registered to the system in two ways
- in the field by an authorised person using their mobile telephone, or
- by an authorised person, usually the district iSIKHNAS coordinator, via the iSIKHNAS website.
Registration using the iSIKHNAS website
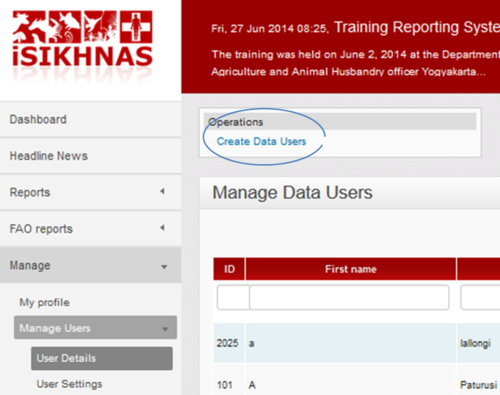
Using the iSIKHNAS main menu, go to Manage : Manage Users : User details.
Then click on Create Data User
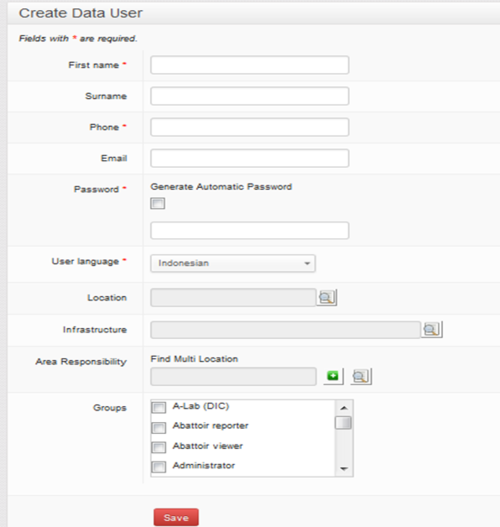
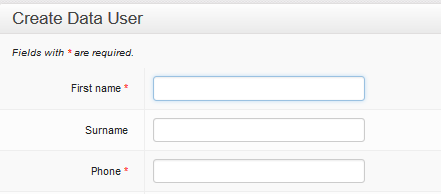
You will be taken to a new Create Data User form.
Click your mouse in the First name field. The outline colour will change to blue to show that it is active.
First name
Enter the first name of the new user. Try to use correct capitalisation for these name fields. Remember the user name will appear in multiple reports and other areas of the website. Please make sure it is correctly spelled and as complete as possible.
Surname
Move to the Surname field by either pressing ![]() or by using your mouse to take you to the new field and clicking in the empty box. This field is only required for those people who use family names. Leave the field empty if there is no surname.
or by using your mouse to take you to the new field and clicking in the empty box. This field is only required for those people who use family names. Leave the field empty if there is no surname.
Phone
Next, enter the mobile phone number of the new user. This telephone number must be to the unique to the user. It must be the number to phone they use every day for their work. This telephone number will identify the new user to the system every time they report or query data.
Enter an email address if the person uses email. The address should be unique to the new user. It cannot be a group email address, or one that is used by other iSIKHNAS users. By adding an email address, a new user can arrange to have regular reports using iSIKHNAS data, sent by email. The email address can always be added or changed later.
Password
The web password will be useful if users want to visit the iSIKHNAS website to
- Look up data on the site.
- Change a password.
- Change some user details.
You can click the checkbox Generate Automatic Password to ask the system to make a unique password for the new user. Write the password on a piece of paper and give it to the new user.
Passwords can be changed later by the user. Coordinators can also change passwords for users who have forgotten their password. You can either use a password chosen by the new user by writing the password into the empty field.
A word about passwords: Passwords should not contain personal information, whole words or well known characters or names. The best password are longer than 8 characters and created by coming up with an entire phrase that’s easy for the user to remember. Use the first letter, number or symbol from each word in the phrase, keeping punctuation intact as well.
So, let’s take this, for example: Hi! I’m Dhony. I’m from Sulawesi and I like the number 3! Use the first letter of each part and some of the punctuation, and the password could become: H!ImDImfSul&Iltn3! That’s a good, strong, long password that’ll be hard to crack and easy to remember.
Location
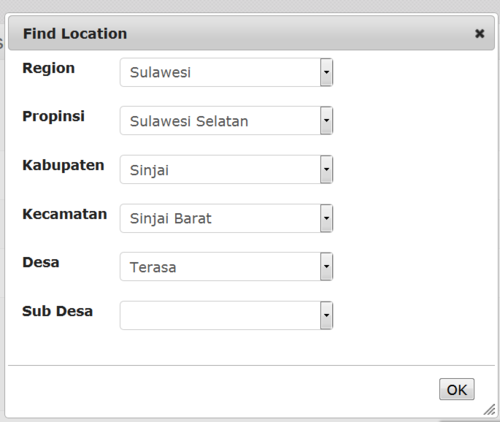
Choose the location of the usual place of work of the new user to the village (desa) level. Go through each level to pick from the drop down lists.
When you have finished click OK.
The full location code and name will appear on the form.
Infrastructure
New users can be assigned to infrastructure where they work. The main infrastructure types are
- Abattoirs
- Aggregation points
- Laboratories
- Semen collection points
- Markets
- Veterinary services offices
- Checkpoints
New infrastructure can be created by coordinators using the Manage : Infrastructure
Area responsibility
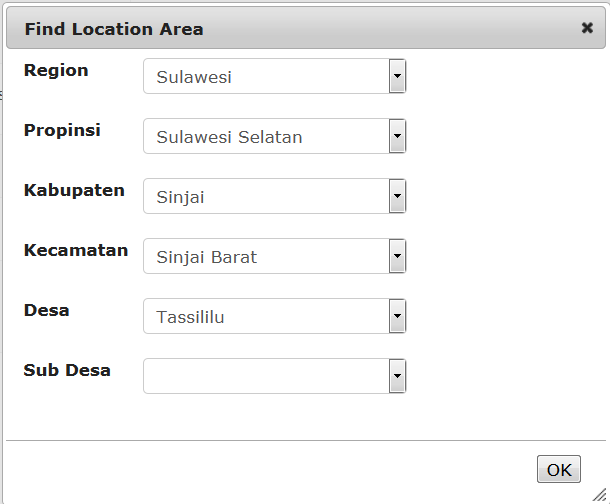
As well as being assigned to a particular working location - where a user is phyically based most of the time - users are assigned to one or more areas of responsibility. This defines the whole area the user works or is responsible for. This will tell iSIKHNAS that this person should receive alerts or information relevant to that area. It helps to filter the data for the user, to make sure only the most relevant data or alerts are sent.
A regional coordinator for Sulawesi, for example, would be assigned as follows
The provincial coordinator for Sulawesi Seletan would be assigned like this
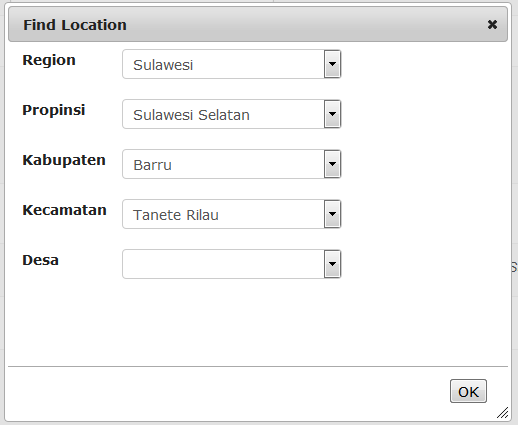
A dinas paravet in Barru, Sulawesi Seletan might be assigned like this
And so on
A village reporter (Pelsa) would be assigned as follows
A pelsa with two desa under her responsibility might look something like this
Group
Each user is given a User type and is part of a User Group. Some users are assigned to more than one group. This determines what the person is permitted to do, what data they are permitted to submit and view, and what functions they may perform on the iSIKHNAS website.
Users can be assigned to several user types depending on their roles. Click here for more detailed descriptions of user types.
English
| Code | User Type |
|---|---|
| 1 | Champion |
| 2 | Regional coordinator |
| 3 | Provincial coordinator |
| 4 | District coordinator |
| 5 | Vet Services Vet |
| 6 | Vet services paravet |
| 7 | Vet service other staff |
| 8 | Contract Worker |
| 9 | Village reporter |
| 10 | Farmer |
| 11 | Abattoir reporter |
| 12 | Meat inspector |
| 13 | Drug inspector |
| 14 | Check point officer |
| 15 | Quarantine |
| 16 | Public health |
| 17 | A-Lab (DIC) |
| 18 | B-Lab (provincial) |
| 19 | Inseminator |
| 20 | Trainer/demonstrator |
| 21 | Vet services viewer |
| 22 | Quarantine viewer |
| 23 | Public health viewer |
| 24 | Abattoir viewer |
| 25 | Administrator |
| 26 | Provincial Kesmavet Coordinator |
| 27 | National Production Coordinator |
| 28 | Production Provincial Coordinator |
| 29 | Reporting Farmer |
| 30 | Epi Viewer |
| 31 | Project Viewer |
| 32 | Semen collection centre officer |
| 33 | District Production Coordinator |
| 34 | Public Vet |
| 35 | Kader Vaksinator |
| 36 | Head of district livestock and animal health office division |
| 37 | Head of provincial animal health division |
| 38 | Head of dinas vaccination team |
| 39 | data encoder |
| 40 | Head of field vaccination team |
| 68 | C lab |
| 69 | SMS Admin |
| 70 | Survei team |
| 71 | Pregnancy Test Officer |
| 72 | Manager SPR |
| 73 | Tim Upsus Siwab |
| 74 | Superuser |
| 75 | Update locations Officer |
| 76 | Recorder Siwab |
| 77 | champion 1 |
| 78 | champion 2 |
| 79 | Technical Reproduction Assistant |
| 80 | AMPM reporter |
| 81 | Wastukan |
| 82 | Vet Author |
| 83 | Vet Authority Province Level |
| 84 | Sensus Reporting |
| 85 | Logistik Admin |
| 86 | Qurban Inspector |
| 87 | animal traders |
| 88 | API user |
| 89 | Academics |
| 90 | Pelapor Cold Storage |
| 91 | Head of Provincial Services |
| 92 | Head of District Services |
| 93 | Head of Animal Health/Public Veterinary Section |
| 94 | Director of Animal Health |
| 95 | Director of Veterinary Public Health |
| 96 | Kepala Seksi Keswan/Kesmavet Provinsi |
| 97 | Private Abbatoir reporter |
| 98 | Chief Veterinary Officer |
| 99 | Vet Authority Animal Health |
| 100 | Vet Authority Veterunary Public Health |
| 101 | Vet Authority Animal Quarantine |
| 102 | Vet Authority District Level |
| 103 | Head of Technical Unit |
| 104 | Babinsa & Babinkamtibmas |
| 105 | Babinsa atau Babinkamtibmas |
| 106 | Breeding officer |
| 107 | veterinary center staff |
| 108 | Public Reporter |
| 109 | Compartement Reporter |
| 110 | Vets Compartment |
| 111 | Compartement Champion |
Manage : Manage Users : User Settings
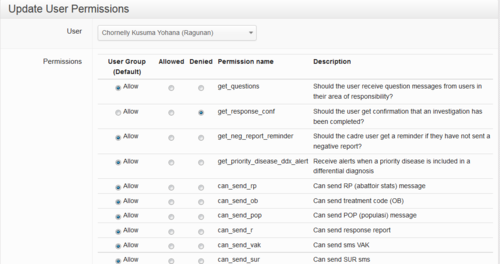
Update User Permissions
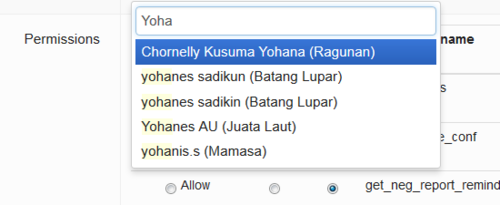
This part of the website allows coordinators to set the permissions differently for each individual user according to their abilities, training or responsibilities. The example below shows the way the page is organised. The name of the user is identified at the top of the page. You can start typing the name and a drop down list of the closest options will appear.
The list of default permissions will differ according to the User Type the person has been assigned. Coordinators and vets will have a long list of permissions which are possible to change. Other users, such as pelsa, will have very few.
Individual user permissions can be changed from the default settings by clicking on or off the Allowed and Denied buttons.

